MARCH 2022 |
Ohmygoodness it is a season of projects! The front and back yard is all ripped up, our whole kitchen is in our dining room and we have no working stove (as it suddenly became a fire hazard after spilling a 32 oz jar of bean water on the control panel). But lo and behold! On the 18th I just finished with one of my BIGGEST 2022 projects (I have 22 to get through this year). It took me 39 days total, and about 33 hours or more:
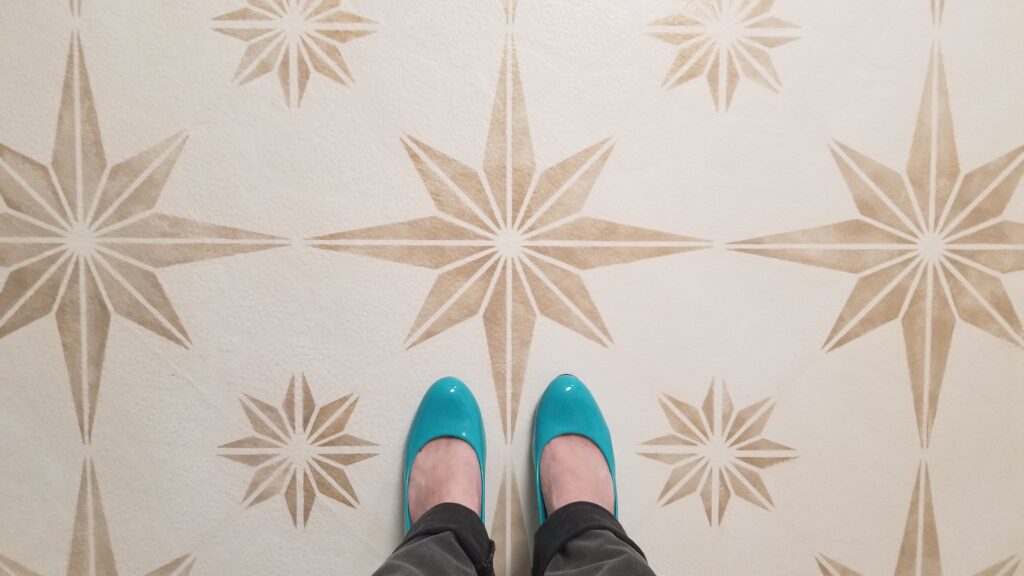
Painting & Stenciling my kitchen floor!
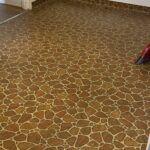
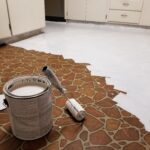
Hey, I figured, if it’s going to be years until I actually do a kitchen remodel, I might as well paint the floor so I don’t have to look at it! GOODBYE ugly, brown, “Flintstones,” 70s asbestos vinyl sheet flooring!! (After I coated the floor with the first layer of bone-white primer, I felt it lift a subtle tinge of icky depression that had settled in my soul. GOOD RIDDANCE!
  |
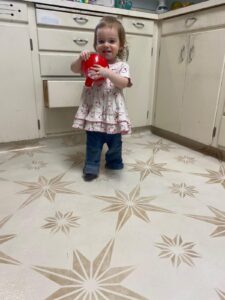
And ‘Hello!!’ to my now lighter, old-world Moroccan star stenciled floors. It’s much lighter, and I hope has that touch of magical drama I want people to feel. The stars begin darker and get lighter across the floor. The stars were painted with a custom mixture of different antique golds, copper, black and some primer base mixed in. I bought the largest size stencil from https://www.cuttingedgestencils.com/and their website has detailed instructions on the how-to. I’m glad I can use the stencil again, maybe for my outdoor patio cement! I would also like to choose another awesome stencil for a bathroom floor project!
There are so many options to choose from for walls, floor, and furniture too! I definitely will be stenciling other areas of my home again and look forward to sharing the transformation!
(Now I have to do the cabinet fronts, because now they look gross and filthy compared to the floors… It never ends.
Before you embark on a journey like mine, I would suggest begin with a smaller project (like I should have done), like a bathroom floor, before taking on a large area. That way you learn what works from your smaller project to help you with a larger one. This project from start to finish took me 39 days total (guessing by my calendar notes, about 25 days I actually worked on it).
The process included:
- About $100 in materials: stencil, paint, polycrylic & tools
- 2 hours of scrubbing the floor clean
- 2 hours of scuffing vinyl with scotch brite sanding pads,
- 4 hours priming (3 coats),
- 5 hours (guess) testing & deciding on a color
- 15 hours (guess) stenciling and detailing (over 17 days on/off),
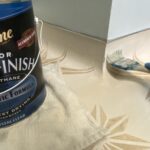
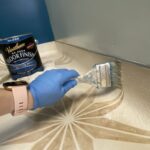
- + 5 hours polycrylic (4 coats)
ESTIMATED TOTAL TIME = 33 hours, but probably an underestimate! Well, I can safely say I feel like a floor stenciling expert and you could hire me to do your floor too! haha
Stenciling was the most time-consuming part of it because I was new to the technique and spent time correcting & detailing. The entire project took so long because having an 18-month-old meant my work time was limited to naps & bedtimes after 9pm. It was difficult stenciling near the edges of the floor where it curves up the wall. I would get sleep deprived in order to make progress.
Things I learned:
- I had only mixed up a few ounces of the paint color I wanted. It would have been so much faster if I had just worked with more paint instead of taking more time trying to conserve what I had to work with.
- I used two methods to stencil: a round brush and a high density foam roller, so some stars look different than others. I like the look of the foam roller better and the stars that had less paint loaded onto it actually turned out the BEST with no mistakes.
- A little paint goes a long way. Even the most subtle marks on a light floor can be seen. So it’s true that when you are choosing your stencil color, you don’t necessarily need a high contrasting shade/color compared to the base coat. Thick, wet paint bleeds under the stencil, making more work for you later. When you load your foam roller with paint, use very little paint, but don’t water it down. It’s better to use less paint and gradually build up the layers of paint with your roller.
- I saved money by skipping the base coat and had the paint store tint the primer to my desired shade instead.
- TIP: There are many different techniques to make your stencils look unbelievable, like 3D effects by adding in a drop shadow.
Stenciling can be a great alternative to wallpaper or expensive tiling in a bathroom or kitchen, and it gives you and your guests that “wow factor” you are going for in your home, for a small fraction of the cost! I’m happy with how it turned out, and I’m so glad it’s finally done!!!
Again, Cutting Edge Stencils has so many options to choose from for walls, floor, and furniture too! I definitely will be stenciling other areas of my home, like my back patio cement and upstairs bathroom and I will be sharing the transformations! #cuttingedgestencils


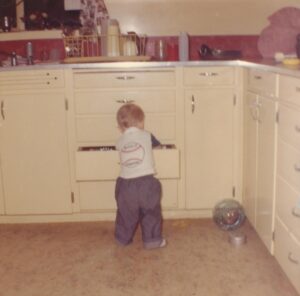
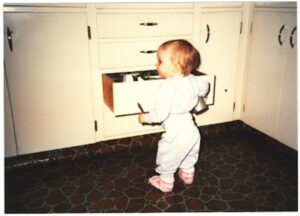
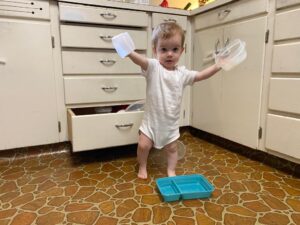
This was my Grandma’s house, so there are three generations of toddlers getting into the SAME drawers in the kitchen! Here are some pictures over the years!